
Hungry Ghost
Creating a Fill Effect with Sprites in Unity
The Goal
Many common game features can benefit from using a fill effect on an image. You may be filling in a loading bar, health bar, power up meter, or creating an interesting visual effect.
In Unity, they provide this effect for FREE...as long as you are using a Canvas and an Image component. However, if you are working on a 2D game using SpriteRenderer objects then you may need an alternative solution.
You could make a World Space Canvas and place it among your sprite objects. But in this article, I'll show you how to achieve a similar effect while keeping with your "regular" 2D SpriteRenderer objects. This method may be challenging if you are brand new to Unity, but otherwise you should be able to follow along!

How to Make This Effect
1) Collect your art assets. For this tutorial, I am using the same white box image 3 times, and each one has a different color tint (black, grey, and green). But you may want to have a different background or fill image for your situation
2) Edit the Import settings on your fill image to set the pivot at the bottom of the image. You can do this by selecting the image in the Project View, and then editing the Pivot field in the Inspector.
3) Create an empty object in the scene to be the parent of this fill bar and all the objects we will create. Renaming objects as you go allows you to quickly refer back to them later, so give it a name like FillBarParent.
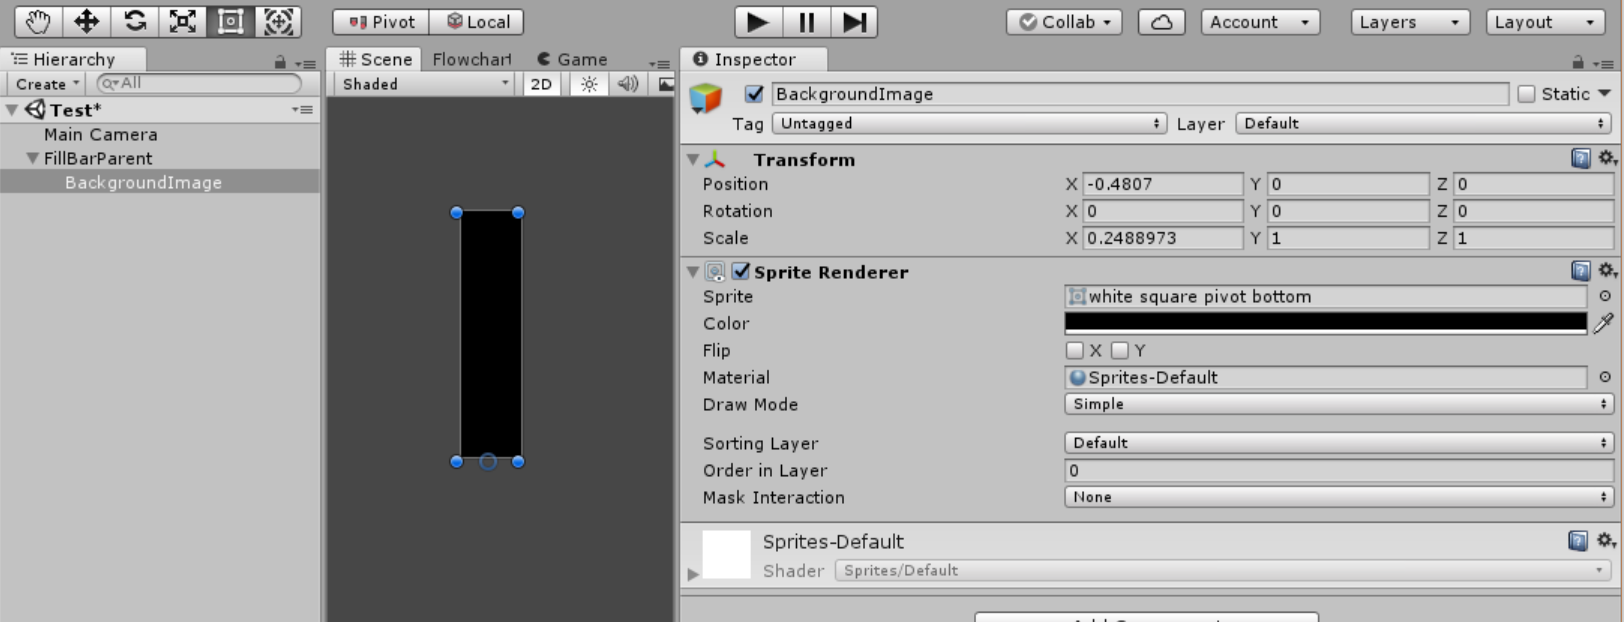
4) Create a new 2D object->Sprite in the Hierarchy view and name it BackgroundImage. This should be a child of the FillBarParent object. Set the Sprite in the SpriteRenderer to the background picture you are using and adjust its size as needed. I used a solid white square image and set the color value to black.
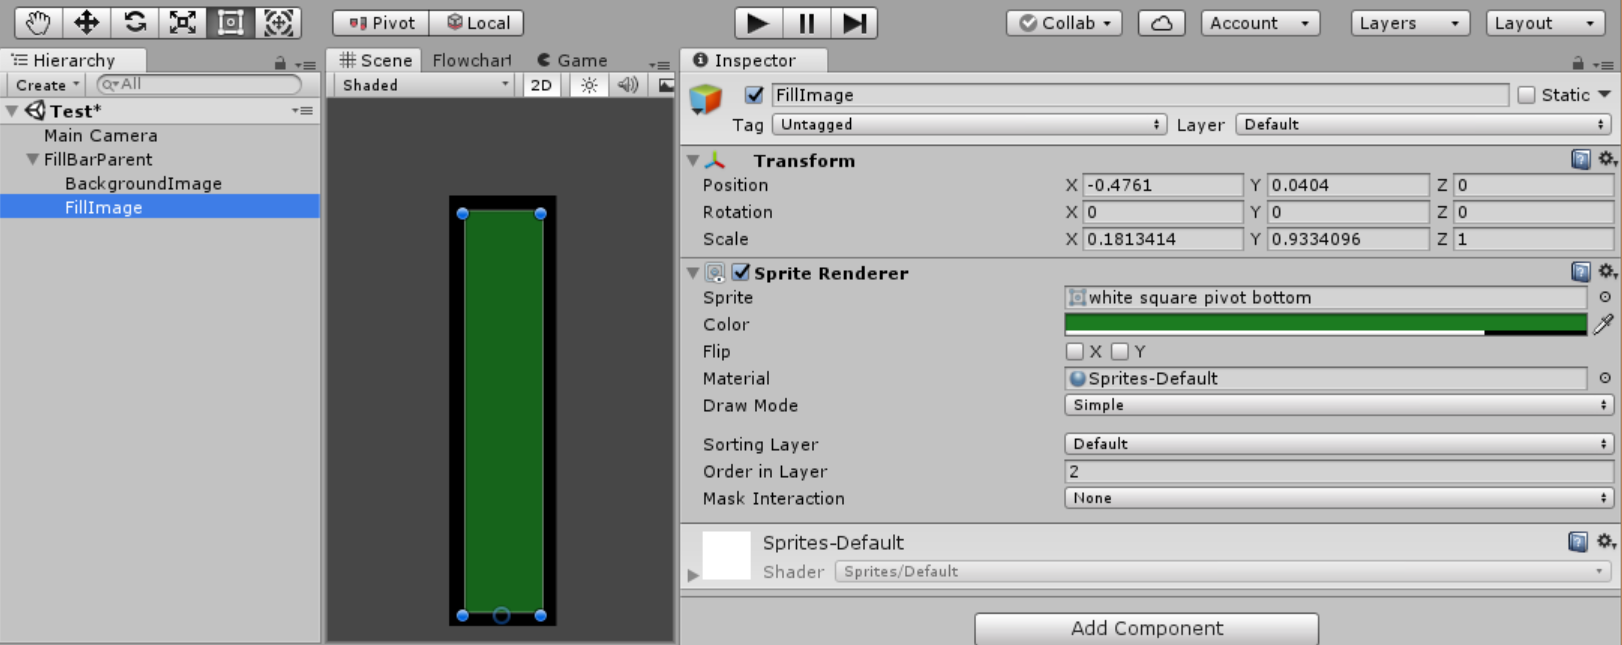
5) Create a new 2D object->Sprite in the Hierarchy and name it FillImage. This should also be a child of the FillBarParent object. Set the Sprite in the SpriteRenderer to the fill image you are using. (This is the one that should have the pivot set to the bottom of the sprite.) I used a white square image and set the color value to green. Again, adjust its size and position as needed.
6) Line up the two images so the z-order or order in layer are correct as well (the FillImage should be on top of BackgroundImage), and adjust the scale of the FillImage to completely fill in the bar, as if it was 100% full.
7) Duplicate the FillImage object and name it FullFillImage. I changed the color on mine to grey to use it as an additional background for the fill bar, but you can also disable this GameObject or SpriteRenderer if you need to. The purpose of this object is just to visually show us the Y scale value needed for a full bar, and allow us to easily keep track of the value for our script later.
8) Now you can change the Y Scale value on the FillImage object as needed to demo the fill bar in action (drag the Y Scale value left and right in the inspector). 0 should show an empty bar.
9) Create a new C# script in your Project View and name it SpriteFillBar. Open the script for editing and insert the code below. This snippet exposes a method that adjusts the fill bar based on a fill amount value from 0 to 1. 0 means empty, 1 means full.
using UnityEngine;
public class SpriteFillBar : MonoBehaviour
{
    public Transform fullFillImage;
    public Transform fillImage;
    void Start()
    {
        // Default to an empty bar
        var newScale = this.fillImage.localScale;
        newScale.y = 0;
        this.fillImage.localScale = newScale;
    }

    public void SetFillBar(float fillAmount)
    {
        // Make sure value is between 0 and 1
        fillAmount = Mathf.Clamp01(fillAmount);
        // Scale the fillImage accordingly
        var newScale = this.fillImage.localScale;
        newScale.y = this.fullFillImage.localScale.y * fillAmount;
        this.fillImage.localScale = newScale;
    }
}
10) Add the SpriteFillBar component to your FillBarParent object, and drag the FillImage and FullFillImage objects into the appropriate Inspector fields. And that's it!
11) Now any script can access the SpriteFillBar component and call its SetFillBar method. The fill bar will be set accordingly. This could be during combat, after picking up a powerup, or in my case, as the player hovers over a location.
Thanks for reading. If you'd like to know when I write more articles like this, follow me on Itch.io! You can also follow the Twitter for my indie game studio: Pretty Smart Games here: @PrettySmartNews
Now go out and make your game!
Comments
Log in with itch.io to leave a comment.
Hey, dude. I know this is 2 years ago, but this is still the only and effective tutorial I found on this topic :) So thank you for posting this, I was searching for progress bars without Canvas usage and I only found people saying that we should use Image and we are stupid if we don't use that...
All I needed to kow was part of one of your sentences- "Use scale"... And I knew... Thanks again ;)
Thanks for writing these tutorials!
No problem! I love the site and the community we have here!